Sunday, March 16, 2014

Husqvarna Viking motor assembly


Husqvarna Viking sewing machine


Check both carbon brushes by removing the brush cap. The carbon brushes should be at least 50% the size of new ones. It is recommended that both the carbon brush and spring be replaced. After installing new carbon brushes dress the commutator to seat the brushes.

The Husqvarna Viking sewing machine motor noise is affected by the load and the belt tension. If the motor deviates from normal check the tension of the cog belt. When replacing carbon brushes it is important to note the model of the machine. Starting with 6460 the carbon brush holder (16) was redesigned. Once the carbon has worn the holder will not allow the carbon brush spring (13) to ride the commutator. When ordering carbon brushes it is best to use the 40 16295-01 from 6460 and later models. For earlier models use the carbon brush 41 14 934-01 which will repel from the commutator automatically when the carbon is worn.


Husqvarna Viking sewing machine motor brushes

Husqvarna Viking sewing machine motor brushes

Husqvarna Viking motor assembly


Husqvarna Viking sewing machine


Check both carbon brushes by removing the brush cap. The carbon brushes should be at least 50% the size of new ones. It is recommended that both the carbon brush and spring be replaced. After installing new carbon brushes dress the commutator to seat the brushes.

The Husqvarna Viking sewing machine motor noise is affected by the load and the belt tension. If the motor deviates from normal check the tension of the cog belt. When replacing carbon brushes it is important to note the model of the machine. Starting with 6460 the carbon brush holder (16) was redesigned. Once the carbon has worn the holder will not allow the carbon brush spring (13) to ride the commutator. When ordering carbon brushes it is best to use the 40 16295-01 from 6460 and later models. For earlier models use the carbon brush 41 14 934-01 which will repel from the commutator automatically when the carbon is worn.


Husqvarna Viking sewing machine motor brushes

Saturday, March 15, 2014

Husqvarna viking 2000 sewing machine gear

Husqvarna Viking Power Gear

The husqvarna viking 2000 sewing machine power gear or lower gear or gearshift is a practical future to lower the sewing machine speed. This video will show you how it operate and solve some basic problems

Husqvarna Viking 2000 sewing machine


Materials used making the Husqvarna Viking 2000 sewing machine and power gear

Most of the small details (parts) of the sewing machine are made of steel or steel alloys with different grades of tempering. However, quite a lot of the details in the mechanisms are made of die-cast aluminum. In addition, here are some details which must have good bearing properties and wear resistance, which are made of different sorts of plastic. On the subject of plastic, it is important to distinguish between the type of plastic used in design details and the type used for inexpensive packing and throw-away wrappings. The construc­tional plastics have completely different properties and are considerably more expensive. If a detail, e.g., a cog wheel or a programmer, is made of plastic, it must have advantages over metal – e.g., a cog gear will function more smoothly 20 and quietly; a cog gear or programmer will have more wear resistance. If the Husqvarna viking 2000 sewing machine power gear is made of metal it will wear much quicker, even when using the best special steel, as long as the properties are not changed completely by means of an 0il bath or the like. You can find the Husqvarna Viking Technical Manual at this link.

I’ve add more related videos on how to repair your Husqvarna Viking 2000 sewing machine.


Husqvarna viking 2000 sewing machine gear

Tuesday, March 11, 2014

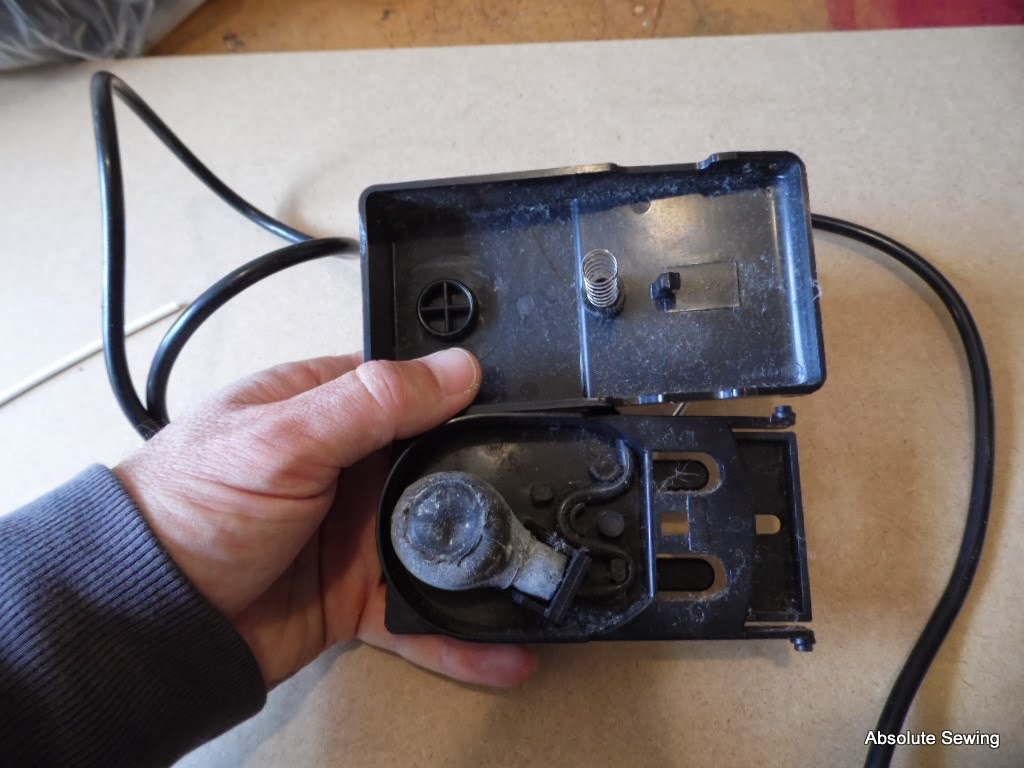
Singer air foot control repair

For Singer models: 4610, 4611, 4613, 4617, 4623, 5932N503, 6230, 6233, 6234, 6235, 6244, 6267, 6268,,7000, 7004, 7005, 7011, 7015, 7028, 7033, 7035, 7037, 7043, 7050, 7060, 9110, 9113, 9117, 9124,,9130, 9133, 9134, 9137, 9143, 9210, 9217, 9224, 9240, 9410, 9416, 9417, 9430, 9444

Singer air foot control repair:


You can open the slideshow and get the full Singer air foot control repair tips with the pictures. I’ve repaired many Elna and Singer air foot controls with this easy repair and it saves you buying a new foot control or parts.
Singer foot control repair.JPG SAM_2926.JPG SAM_2927.JPG SAM_2928.JPG SAM_2929.JPG SAM_2930.JPG SAM_2931.JPG SAM_2932.JPG SAM_2933.JPG SAM_2934.JPG SAM_2935.JPG SAM_2936.JPG


Singer air foot control repair

Monday, March 10, 2014

Overlocker looper timing gear 11226


Overlocker looper timing gear 11226


You can buy the gear from the sites listed below. The Frister Rossmann, Globe and White overlocker are mostly the same machines and use the same parts, gears, blades, looper etc.


Globe looper timing gear 11226 from New Zealand


Globe overlockers


White looper timing gear 11226 from the States


Compatible with White Serger Models:

503, 504, 523 & 534 (Old Style)


Very Old Fritser and Rossmann models


Overlocker looper timing gear 11226

Tuesday, March 4, 2014

Elna air electronic foot control repair and parts


New Elna air electronic foot control


You can by  a new complete Elna air foot control from this link: Elna air electronic foot control in New Zealand. The other parts are available on request and can be found be widely on the internet. You can also by a complete foot control from the links below. This foot control and parts are compatible with the Elna Sewing Machine Models: Air Electronic 38, 39, 58, 59, 68, 69, Carina Jubilee 45, 46, 55, 56, 65, 66, 500, Lotus 22, Stella 17, 27, 37, 57, SU.


Repairing a faulty Elna air electronic foot control:


I’ve set out the following faults that can be checked before buying a new foot control. The easiest way of finding these faults are to dip it in water,  close off the foot control head and apply pressure on the air control membrane to see where the air bubbles escape. This should give you a good indication where the foot control is leaking air.


Finding and repairing the leak


  1. Foot control hose 988667-003: The Elna foot control Hose 988667-003 can get a hole or cut. You can always cut out the damaged part of the hose and providing it is still long enough use the narrow plastic ink tube of a empty ballpoint pen to join it.


  2. Membrane 436410-10: It is not worth trying to repair the Membrane 436410-10


  3. Elna hose head 436410-H: Elna Hose Head 436410-H can get little cracks and won’t seal anymore


  4. Membrane holding plate: Membrane holding plate gets cracked from age or when the four holding screws are tightened to hard. You will get a leek between the membrane and the holding plate


  5. Elna hose head 436410-H: You can easily repair your hose in the same manner as the Singer Foot control below


SAM_2926.JPG

It can be easily repaired using the inner tube of a old ballpoint ink pen

SAM_2929.JPG

Cut a piece of tube for connecting the hoses

SAM_2930.JPG

Insert the plastic tube halfway into the hose


Elna air electronic foot control repair and parts

Elna bobbin case repair for Stella TSP

The spring scale N° 101’670 is calibrated at the factory and should not be modified.


Referring to the first picture in the picture gallery below on how to set the tension on the lower bobbin case:


1. Insert a full bobbin of embroidery thread N° 30-2 ply (60-2) and thread the tension as per drawing. Set the take-up lever in its highest position.


2. Set gratuated wheel “C” on “1″, loosen screw “a” and adjust eccentric “b” to obtain a residual tension between 45 and 55 g by pulling the spring scale 1011670 slowly in the illustrated direction.


3. Tighten screw “a” whilst retaining “b” in its position.


4. Turn graduated wheel “c” several times between “0″ and “2″ and recheck adjustment .

Elna bobbin case repair


Elna bobbin case repair questions can be asked in the comment box at the bottom of the page.


Elna bobbin case repair for Stella TSP